The pistil stitch is what happens when a French knot grows a tail and gets a job. One wrap around the needle, one knot, and one long straight span of thread trailing behind it, and suddenly you have a flower stamen that looks botanical instead of blobby. I ignored this stitch for two years because the name sounded like something from a biology exam. Then I watched a woman at a stitch-in finish a whole spray of cherry blossoms in eleven minutes using nothing but lazy daisy petals and pistil stitch centers, and I went home converted. This tutorial takes ten minutes to read. The stitch itself takes thirty seconds to learn, and it is the fastest way I know to stitch pistil stitch flowers that look like they were planned instead of improvised.
Here is the whole anatomy: a pistil stitch is a French knot worked with the needle coming down a quarter inch away from where it came up. The wrap becomes the knot head, the span of thread between the two holes becomes the tail, and the tail reads as a stamen, a berry stem, or a tiny sprout depending on where you point it. It belongs to the same family as the knotted stitches, which is why my French knot tutorial is the prerequisite if knots still unravel on you. If you can tie one knot, you can stitch pistils. The muscle memory transfers completely.
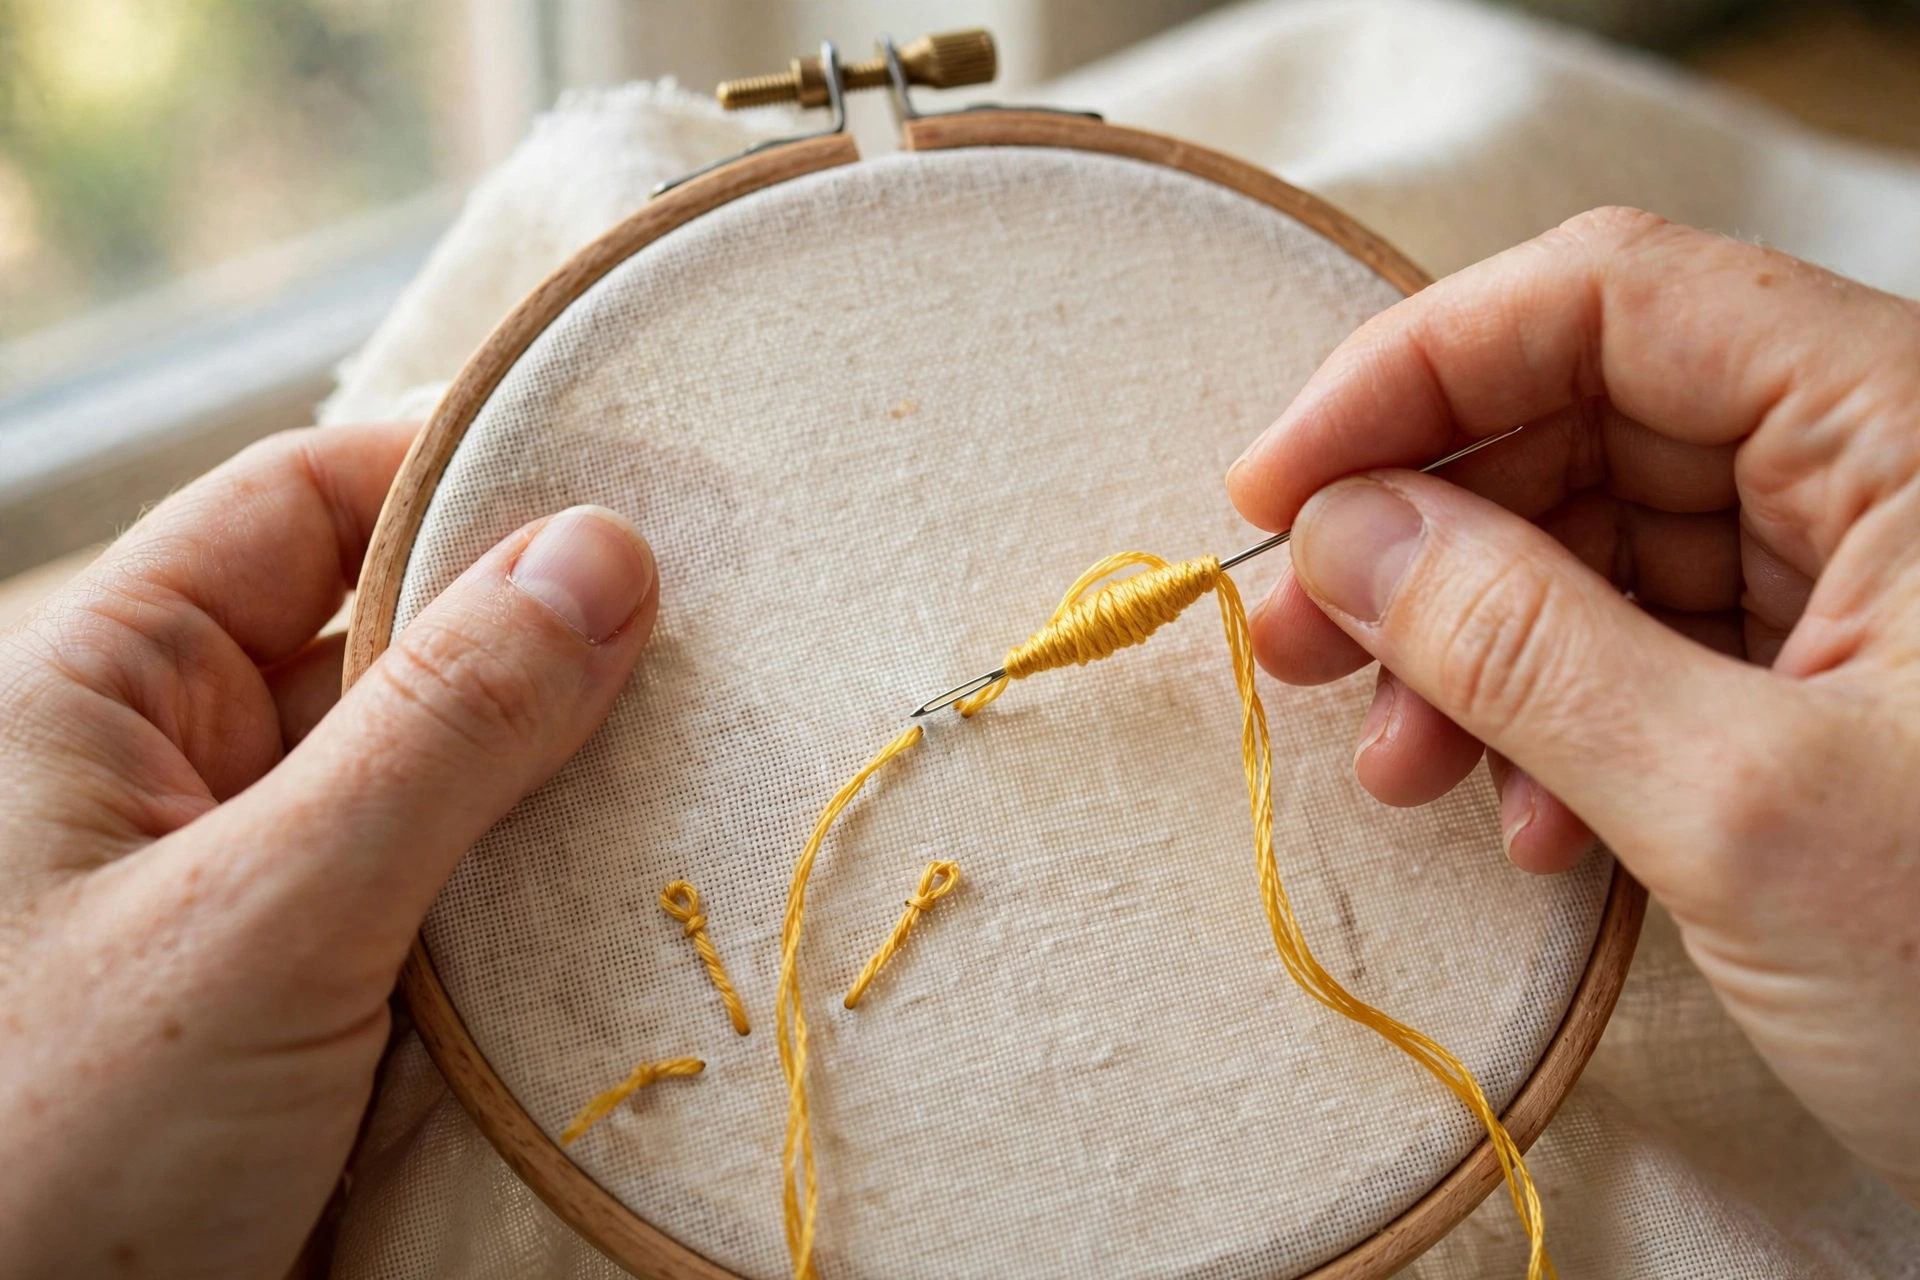
The three moves
1. Come up at the knot spot
Bring the needle up through the fabric exactly where you want the little knob of the stamen to sit. For a flower center, that is just inside the petal ring, about an eighth of an inch from the middle.
2. Wrap once, and mean it
Wrap the working thread around the needle exactly once. One wrap. Two wraps makes a fat knot that eats the tail and turns your stamen into a tadpole, and I have the tadpoles to prove it. Hold the wrap snug with your non-needle thumb while you reposition.
3. Go down a quarter inch away
Push the needle down through the fabric roughly a quarter inch from the entry hole, in the direction you want the tail to point. Keep gentle tension on the working thread as the needle slides through, and the wrap will settle into a small neat knot while the tail lies flat and straight between the two holes. That is the entire stitch. Thirty seconds, as promised.
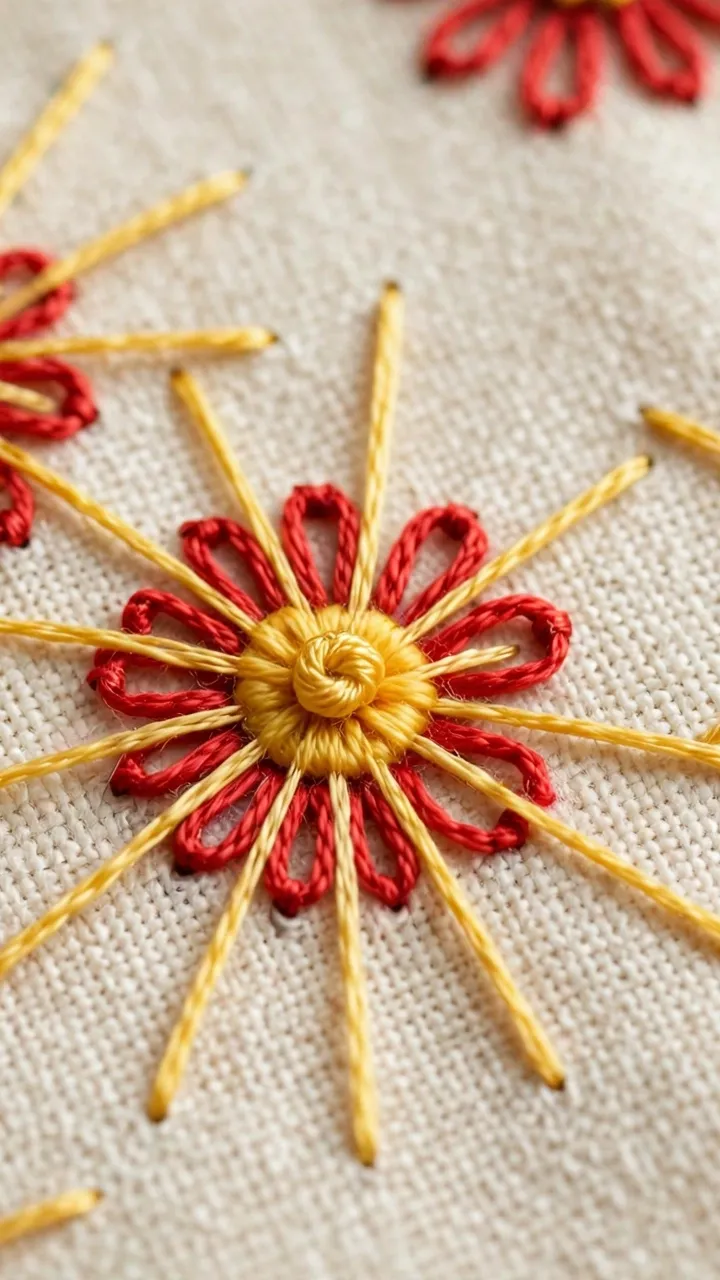
Pistil stitch flowers: the classic five-petal pairing
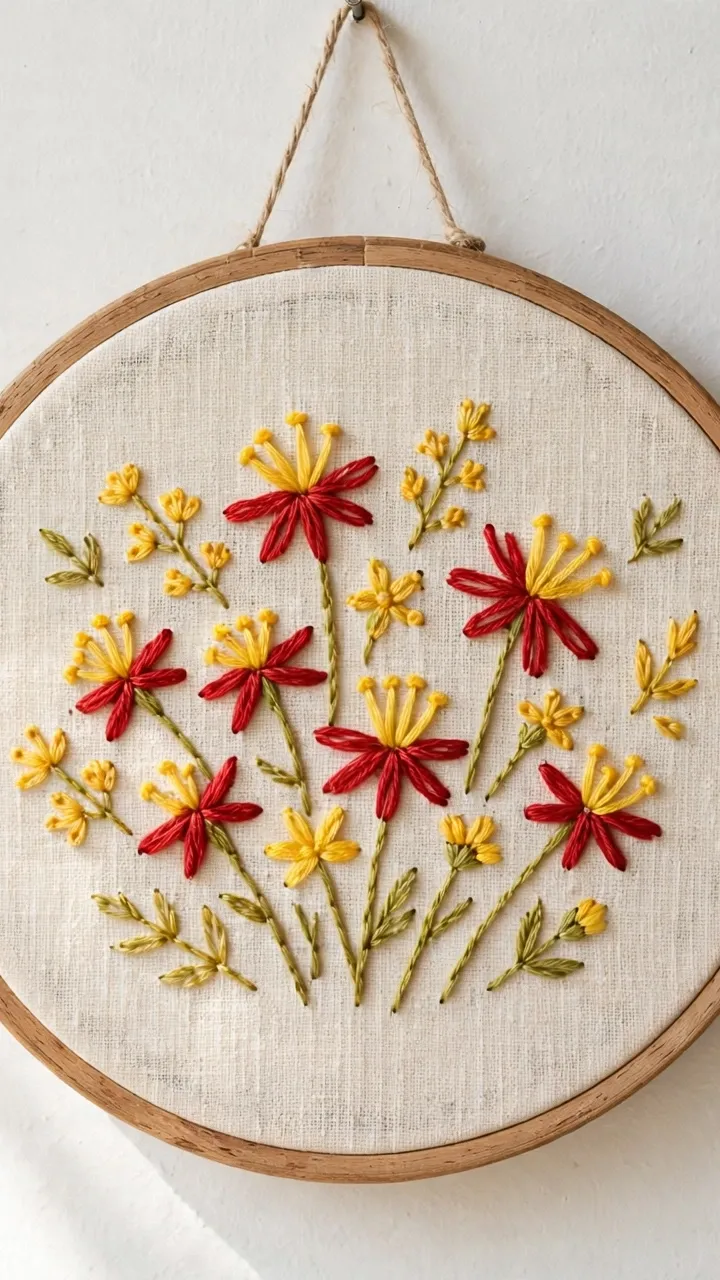
Pistils want company. The classic pairing is a ring of lazy daisy petals with five to seven pistil stitches radiating from the middle, tails pointing outward like a firework frozen mid-burst. I stitch the petals first in two strands of DMC 321, a true red, then add the pistils in two strands of DMC 743 yellow, one wrap each, tails a quarter inch long. Seven pistils takes about four minutes. The result looks like a wild rose from across the room.
Vary the tail length for different flowers. Cherry blossom stamens want short tails, an eighth of an inch, with the knot heads clustered tight. Queen Anne’s lace wants longer tails, closer to three eighths, splayed wide. Daisies barely need pistils at all, a plain French knot center does the job, but add three short pistils around the knot and the daisy suddenly looks hand-drawn in the good way.
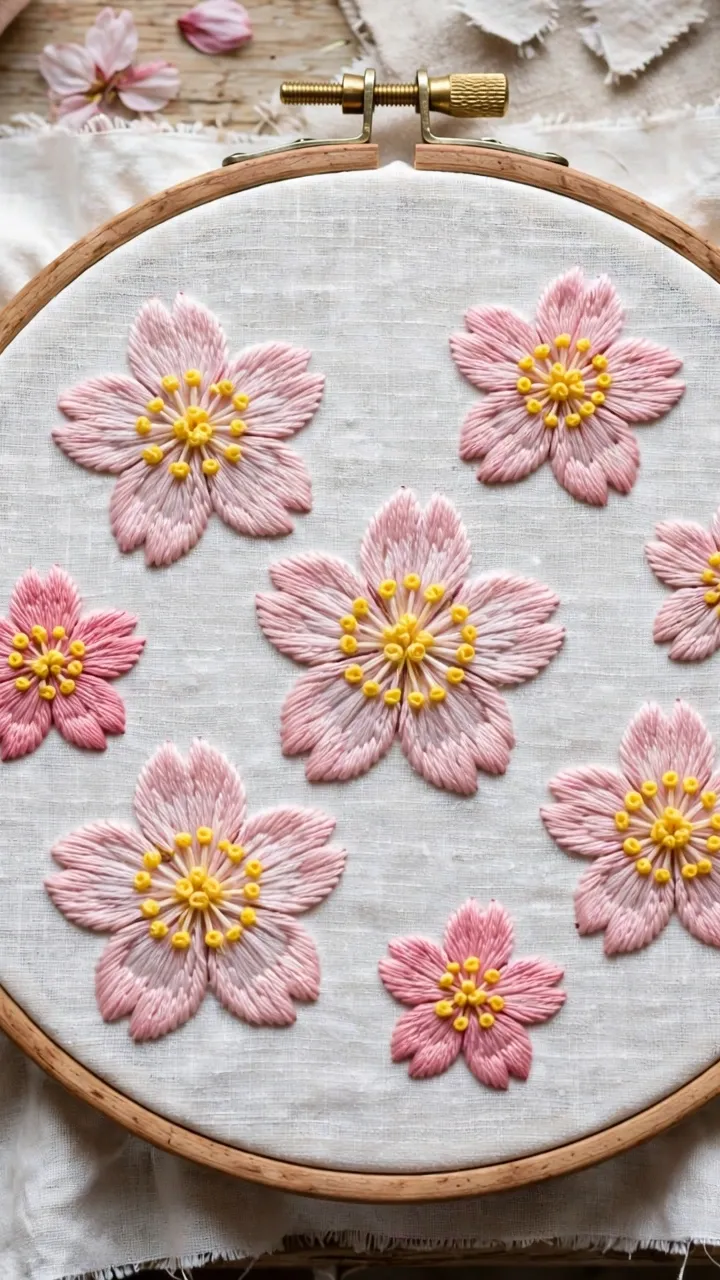
Color pairings that work
The knot head and the tail are the same thread, so pick a color that reads as “pollen” against your petals. Yellow DMC 743 or 744 against red, pink, or white petals is the default for a reason. White DMC Blanc pistils on deep blue DMC 796 petals look like night-blooming something. For autumn flowers, try DMC 721 burnt orange tails on rust petals. The rule is contrast: the pistil should be lighter or warmer than the petal, the same contrast rule that makes flower centers work in general.
What goes wrong
Two wraps instead of one. The number one pistil crime. The knot swallows the base of the tail and you get a lollipop. One wrap, always, unless you are deliberately making jumbo stamens on a large-scale piece.
Tails too long. Anything past half an inch flops, catches on things, and looks stringy. On a hoop art piece, long tails are a dust magnet. Keep tails under three eighths of an inch and they behave.
Knots that vanish. If you pull the working thread too tight as the needle goes down, the wrap slides right through to the back and you are left with a sad straight stitch. Gentle tension. Let the wrap land on the fabric and sit there.
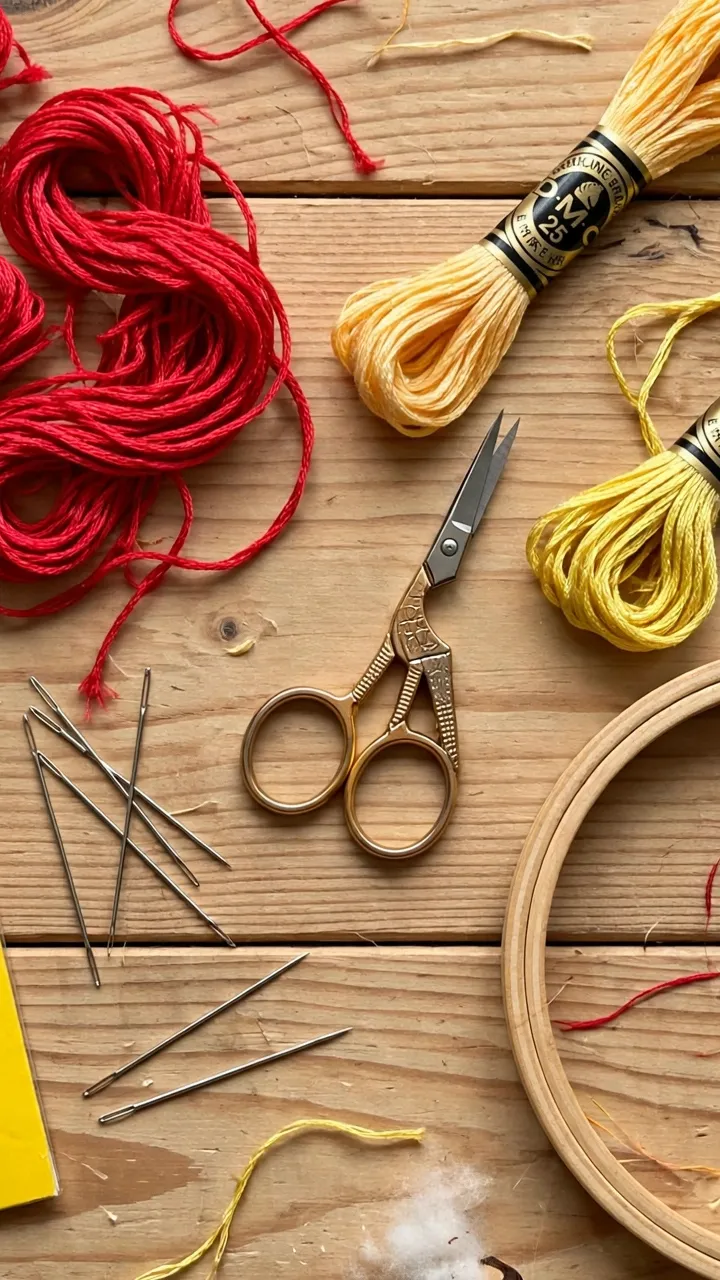
Thread and needle choices for pistils
Two strands of stranded cotton is the sweet spot for most pistil stitch flowers. One strand makes a stamen so fine it disappears into the petals, and three strands makes a knot head that hogs the whole flower center. I stitch nearly all of mine in two strands of DMC on a size 7 sharp needle, because the sharp point slips through the wrap cleanly when you pull the knot down. A blunt tapestry needle drags the wrap with it and gives you a lopsided knot.
For larger flowers, scale everything up together: three strands, a size 5 needle, tails closer to half an inch. For tiny work like a quarter inch blossom on a collar, drop to one strand and keep the tails short, an eighth of an inch at most. The stitch stays the same at every scale. Only the thread count changes.
Five things to stitch first
Ranked by how good they look relative to the effort. A sprig of lavender: straight stems, pistil stitches as buds, done in twenty minutes. A cherry blossom branch: lazy daisy petals plus short pistils, the stitch-in classic. A dandelion clock: white pistils radiating from a center, tails half an inch, absurdly pretty. A fuchsia: two pistils as the dangling stamens, where longer tails are allowed because gravity is the excuse. And a simple five-petal wildflower pinned on a denim jacket, which is where my first pistils went, and they are still there three years later.
That is the pistil stitch. One wrap, one tail, endless flowers. Once your centers stop looking like afterthoughts, the next skill that changes everything is keeping every stitch the same size, which my even stitches guide covers. Go make something bloom.