Some projects take weeks. This one takes an evening. Embroidered bookmarks are the perfect quick stitch. They use up scraps, they teach you new stitches without pressure, and they make gifts that readers genuinely love. If you have ever needed a last minute present that does not look last minute, this is your project.
In this tutorial, you will learn how to make beautiful embroidered bookmarks from start to finish. We will cover the best materials, simple designs that shine at bookmark size, how to finish the edges neatly, and ideas for personalizing them. Let us stitch something small and wonderful.
Why Bookmarks Are Perfect for Beginners
Bookmarks are small, which means low commitment and quick results. You can finish one in a single sitting, and that sense of completion is incredibly motivating when you are learning. They are also wonderfully forgiving. At bookmark size, slightly uneven stitches read as handmade character.
They are also the ultimate stash buster. That half skein of pink, the odd length of green, the single strand of gold you have been saving for no particular reason. Bookmarks turn leftovers into treasures.
What You Need
- Base material. Your options include evenweave fabric like Aida or linen, felt, or heavyweight watercolor paper. Fabric gives the most traditional embroidered look. Felt is the easiest to finish since it does not fray. Paper is quick but less durable.
- Embroidery floss. Scraps are perfect. You need very little thread per bookmark.
- Embroidery needle. Size 7 or 8 for fabric, size 9 or 10 for paper.
- Small sharp scissors.
- Ribbon, cord, or embroidery floss for tassels.
- Fusible interfacing or backing fabric (optional). For structure and a clean back.
- Fabric glue or a needle and thread for finishing.
Bookmark Sizes and Shapes
The classic bookmark is a rectangle about 2 inches wide and 6 to 7 inches long. This fits comfortably in most books without sticking out awkwardly. But do not feel limited to rectangles. Consider these variations:
- Classic rectangle with a pointed, rounded, or fishtail end
- Rounded top for a softer look
- Corner bookmark that slips over the page corner, triangular in shape
- Magnetic bookmark with small magnets enclosed, no tassel needed
Cut your base material slightly larger than your finished size to allow for edge finishing. For a 2 by 6 inch finished bookmark, cut 2.5 by 6.5 inches if you plan to hem the edges, or cut to exact size if using felt or paper.
Design Ideas
Bookmark designs should be simple, vertical, and readable at a glance. Here are some favorites:
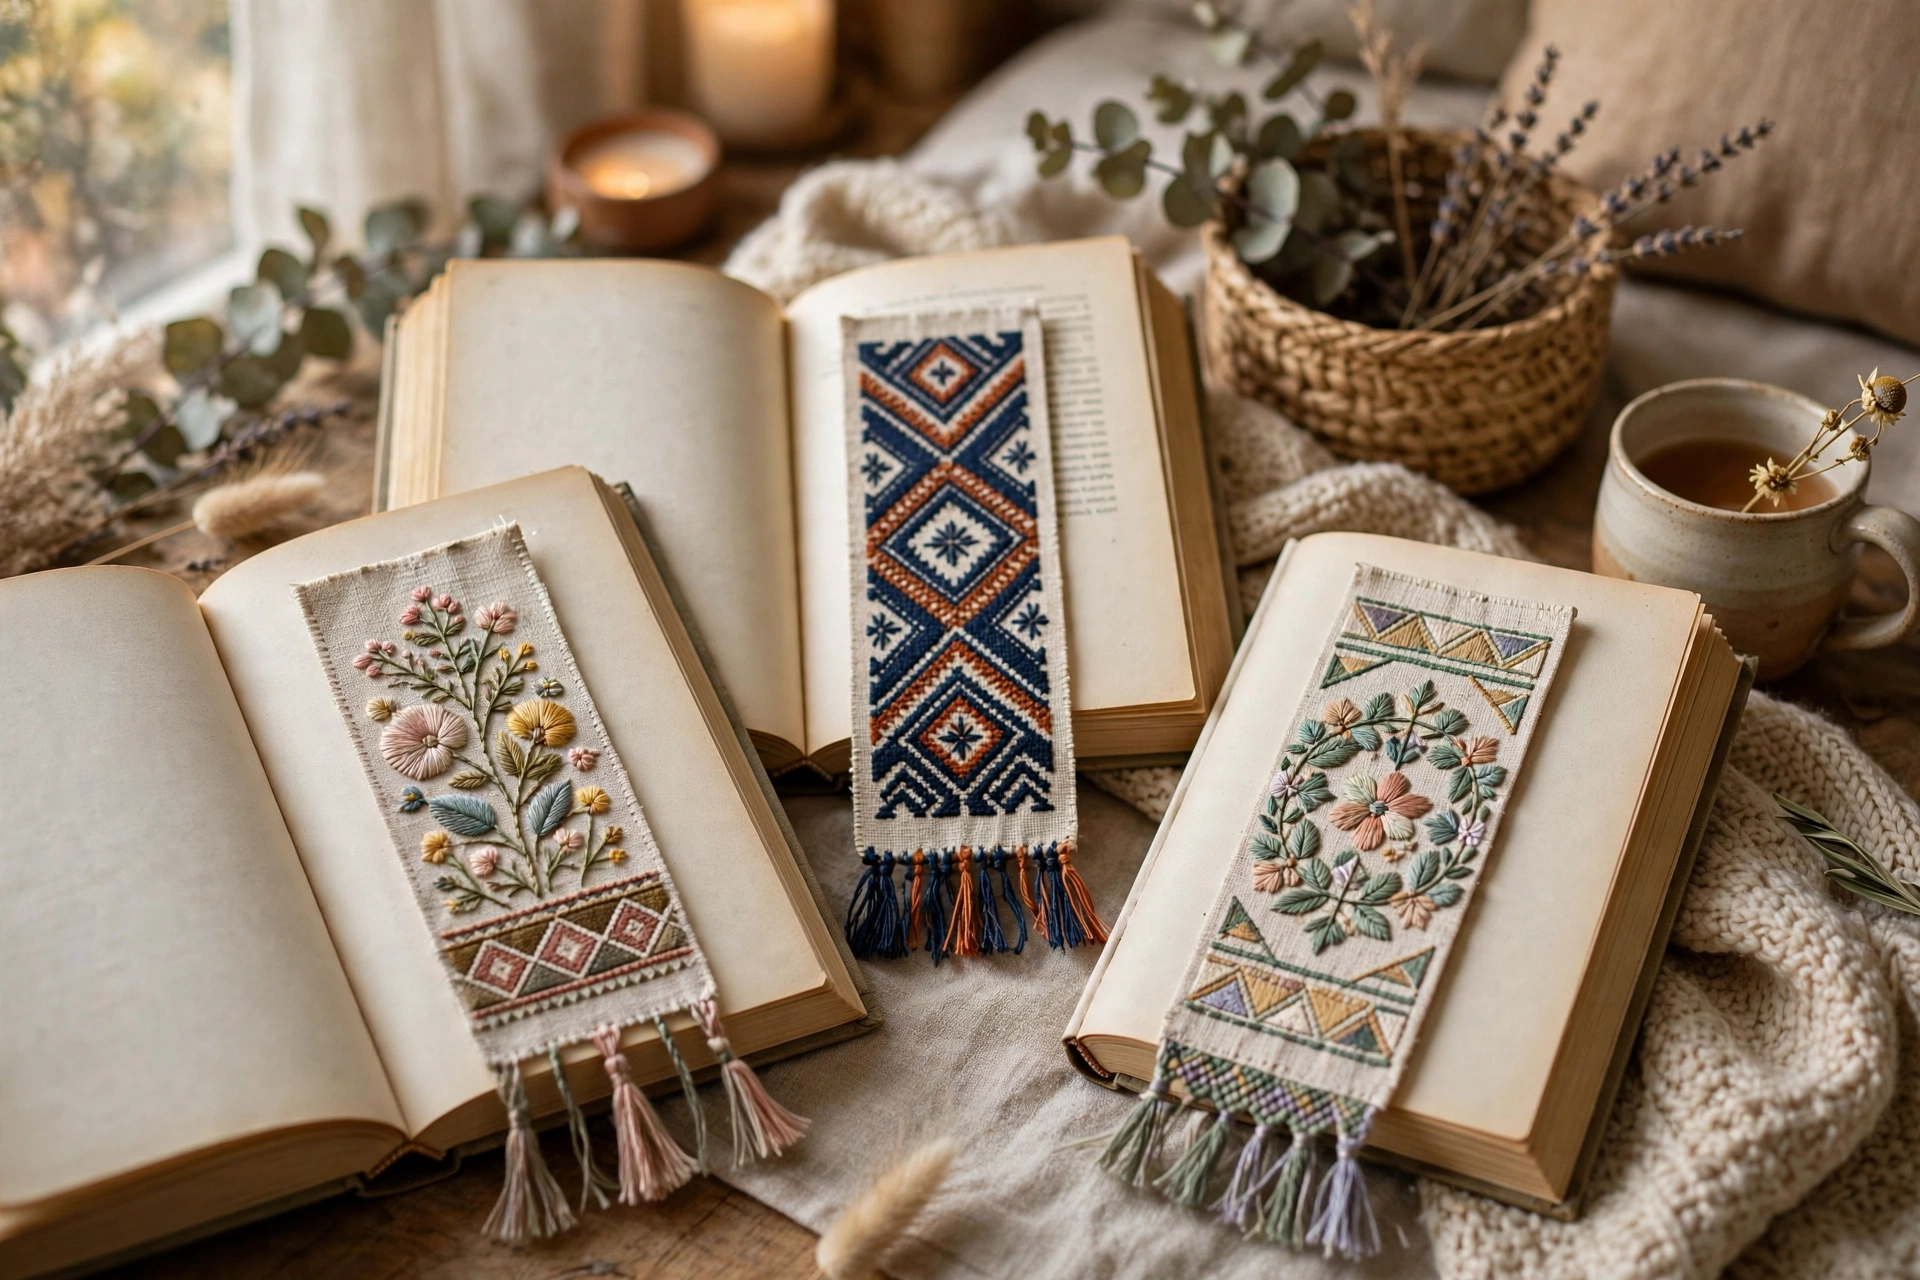
- A single flower stem running the length of the bookmark
- The reader’s initial with small floral accents top and bottom
- A row of tiny motifs. Hearts, stars, dots, or mini flowers in a vertical line
- A meaningful word. “Read,” “dream,” or “wander” in backstitch
- Geometric border with a plain center, modern and striking
- Seasonal designs. Snowflakes, autumn leaves, spring blossoms
Keep the design away from the very edges where finishing might cover it. Leave at least a quarter inch margin on all sides.
Stitching Your Bookmark
The process is straightforward. Transfer or draw your design on the bookmark base, then stitch it using the same techniques you would for any small embroidery project.
Best stitches for bookmarks include backstitch for outlines and lettering, stem stitch for stems and vines, French knots for dots and flower centers, lazy daisy for petals and leaves, and satin stitch for small filled shapes. Two strands of floss is usually right for bookmark scale.
Because bookmarks are handled frequently, secure your thread ends extra carefully. Weave them under at least an inch of stitches on the back. Loose ends will work free with repeated use.
Finishing Methods
How you finish the edges and back determines how professional your bookmark looks. Here are three methods:
Method 1: Felt backing (easiest)
Cut a piece of felt the exact size of your finished bookmark. Apply a thin layer of fabric glue to the back of your stitched piece and press the felt on firmly. Trim any uneven edges after the glue dries. The felt hides all your thread ends and gives the bookmark pleasant thickness. This method works with any base fabric.
Method 2: Folded hem
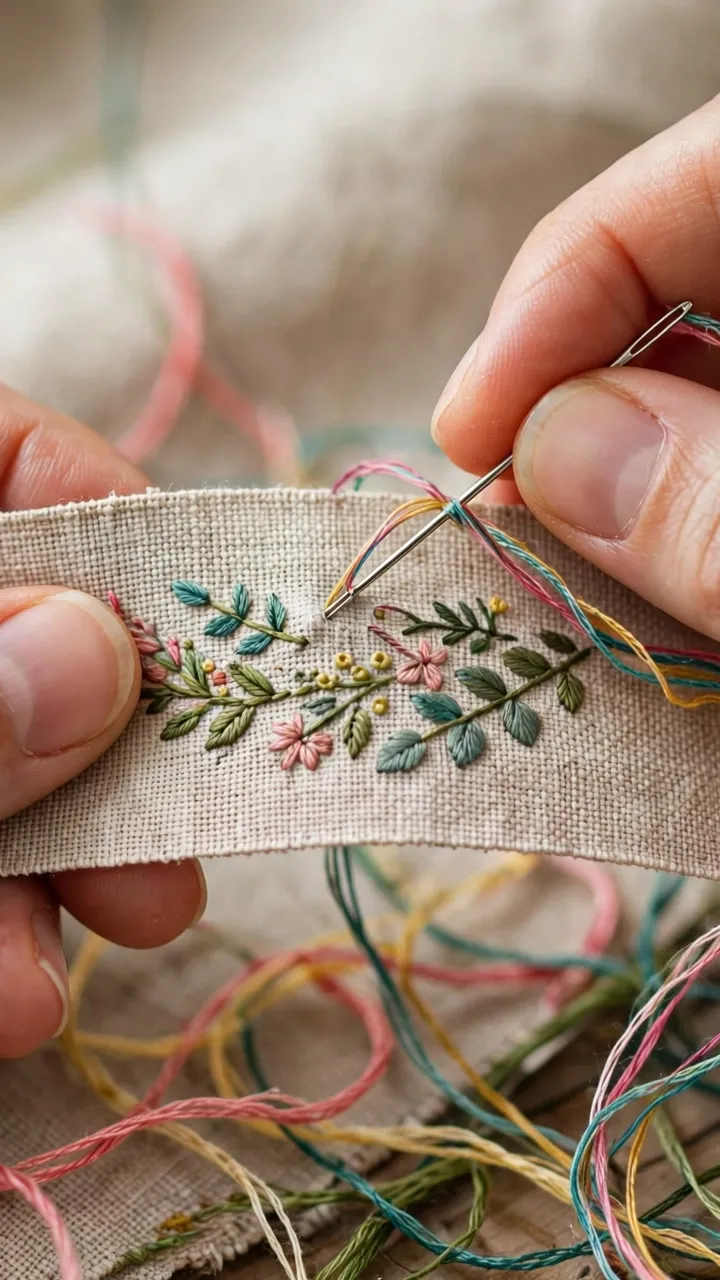
Fold the raw edges under by a quarter inch on all sides and press. Stitch the hem down with a whipstitch or a decorative blanket stitch in a contrasting color. The blanket stitch edge looks especially charming and adds a handmade touch. This method works best with non fraying fabrics or fabric with finished edges.
Method 3: Double sided (nicest)
Stitch your design on one piece of fabric, then place it right sides together with a backing piece. Sew around three sides, turn right side out, press, and slip stitch the opening closed. This gives you a fully finished bookmark with no visible thread ends and the option to add a different fabric on the back. It takes a bit more effort but the result is beautiful.
Adding a Tassel
A tassel is the classic bookmark finishing touch and it is easy to make. Cut a bundle of embroidery floss about 4 inches long, tie it tightly near the top with a separate piece of floss, fold it over, and wrap the neck several times before securing. Trim the ends evenly. Punch a small hole at the top of your bookmark, thread the tassel loop through, and you are done.
Match your tassel color to your design for a coordinated look, or use a contrasting color for a playful pop. You can also use ribbon, leather cord, or a beaded strand instead of a tassel.
Personalizing for Gifts
Bookmarks become extraordinary gifts with small personal touches:
- Stitch the recipient’s initial or name
- Use their favorite colors
- Add a small charm that reflects their interests
- Include a handwritten note about why you chose the design
- Make a set of three or four in coordinating designs
Pair a bookmark with a book for a gift that feels thoughtful and complete. For a book club, stitch matching bookmarks for every member. For a teacher, a bookmark with an apple motif and a thank you note is always appreciated.
Mistakes to Avoid
- Making it too wide. Over 2.5 inches wide and the bookmark becomes awkward in most books.
- Designs too close to the edge. Finishing can cover edge stitching. Keep your margin.
- Skipping the backing. An unfinished back with visible thread ends looks messy and catches on pages.
- Using bulky stitches. Very raised stitches make the bookmark too thick and can damage book spines. Keep it relatively flat.
- Weak tassel attachment. Reinforce the hole with a small stitched eyelet so the tassel does not tear through.
Trying Different Base Materials
Once you have made a few fabric bookmarks, experiment with other bases. Each material gives a different look and feel.
Felt bookmarks are the fastest to make because felt does not fray and needs no hemming. Cut your shape, stitch your design, add a felt backing for thickness, and attach a tassel. Felt comes in beautiful colors, so you can match the base to your design or use contrasting shades for a bold look. The slight thickness of felt also makes these bookmarks easy to find in a thick book.
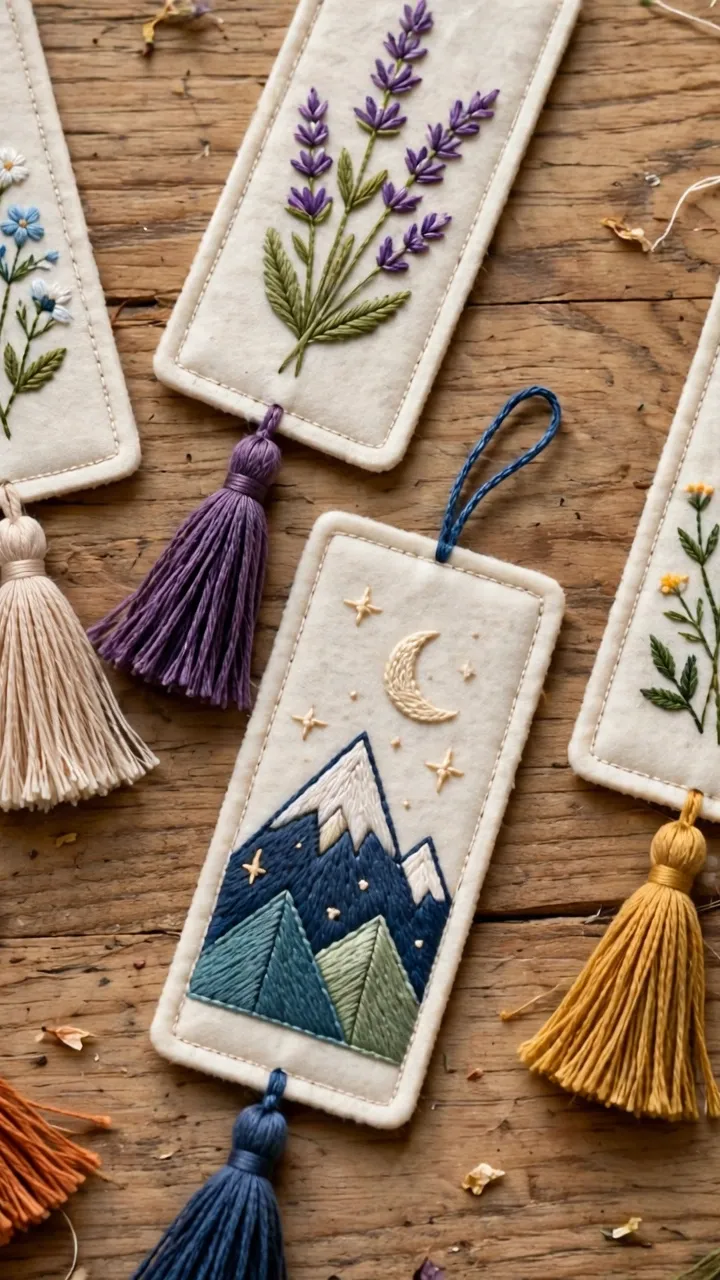
Paper bookmarks use heavyweight watercolor paper or cardstock as the base. Pre punch your stitch holes with a pin before stitching to avoid tearing the paper. Paper bookmarks are wonderfully crisp and take ink beautifully, so you can combine stamping or hand lettering with your embroidery. They are less durable than fabric but perfect for quick gifts and practicing new stitches.
Aida cloth bookmarks are great if you enjoy counted work. The visible grid makes it easy to stitch geometric patterns, monograms, and cross stitch motifs with perfect symmetry. Aida bookmarks have a classic, traditional feel that many readers love.
Packaging Your Bookmarks Beautifully
How you present a handmade bookmark matters almost as much as the bookmark itself. Slip it into a clear cellophane sleeve to protect it and give it a professional look. Tie the sleeve with a thin ribbon that matches your design. For a set, bundle three or four bookmarks together with twine and a small handwritten tag.
If you are giving the bookmark with a book, tuck it into the pages at chapter one so the recipient discovers it when they start reading. That small moment of discovery makes the gift feel even more thoughtful.
Small Stitches, Big Joy
There is something deeply satisfying about finishing a project in one evening. Bookmarks remind you that embroidery does not have to be a grand undertaking to be meaningful. A few inches of stitched fabric can make someone’s daily reading ritual a little more beautiful.
So gather your scraps, pick a simple design, and stitch a little happiness. Then make another one, because the first was so fun you will not be able to stop.